
The Weekender Bag
Pattern & Instructions by Abby Tamez
|
|||
|
Nearly everyone has a favorite travel bag—one that perfectly mixes style with functionality. It’s big enough to fit everything you need for a short getaway, but small enough to tote along without too much bulk. If you haven’t found just the bag yet, though, don’t worry. We can help you create your very own! No matter your experience level as a leathercrafter, the keys for any project are 1) having the right plan, and 2) having the right tools. By downloading our bag pattern, acquiring the necessary items listed below and following our 10 simple leathercrafting steps, you can have your own perfect “Weekender” bag, made all the more meaningful because you created it yourself.
|
|||
|
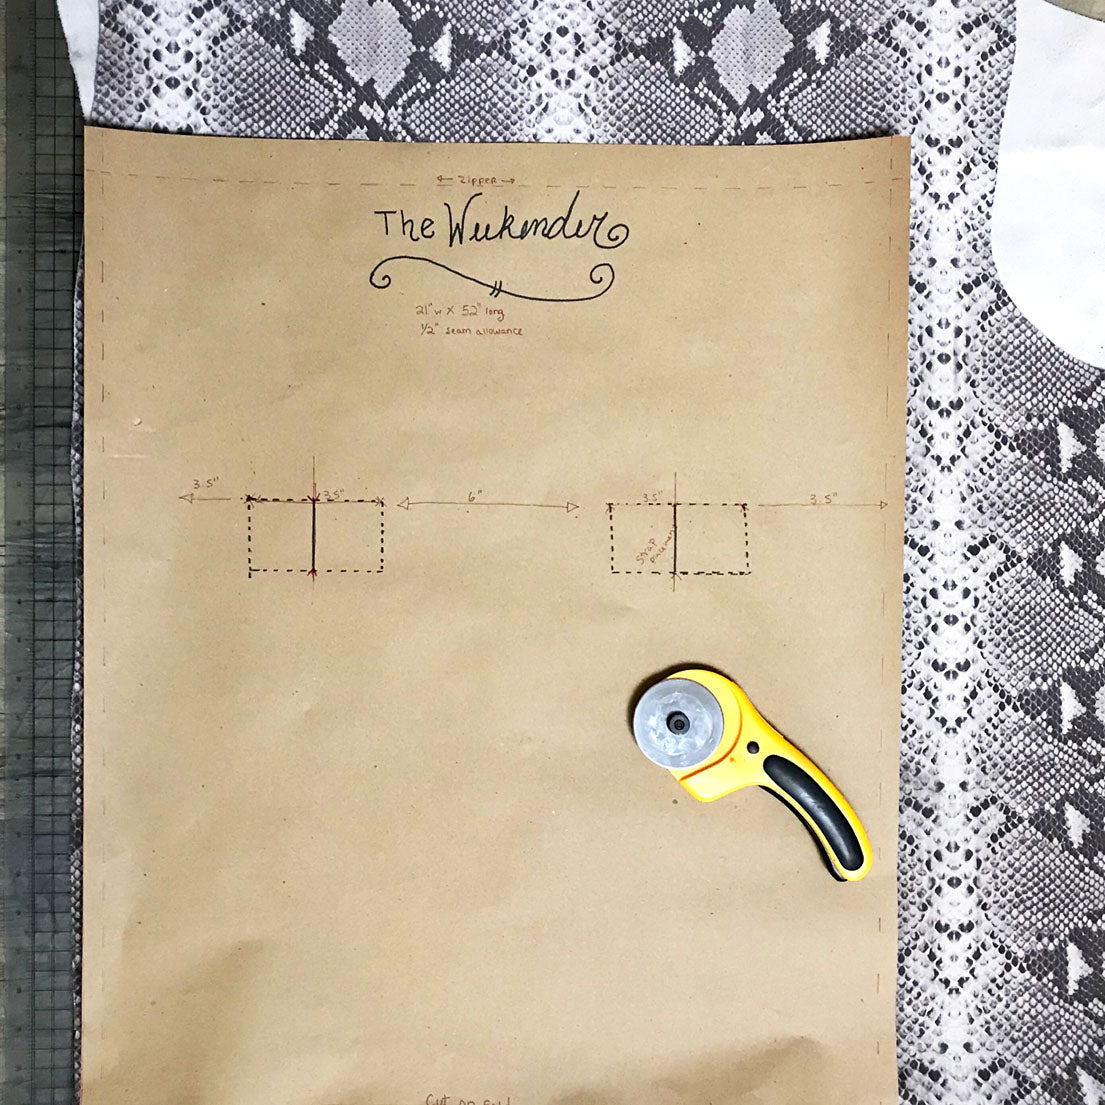
STEP 1 Begin by cutting the main body of the bag on the fold using the Easy Grip Rotary Cutter. If needed, double the pattern to 21” by 50” dimensions to best fit the leather side. Cut 2 side panels and 2 pieces of trim. From the contrast leather, cut out 6 tabs, 2 side pockets, 2 handles, and piping. |
|||
|
|||
|
Next, use the Eco-Flo Edgeflex toedge paint all the tabs. You will do this on the handles, too.
|
|||
|
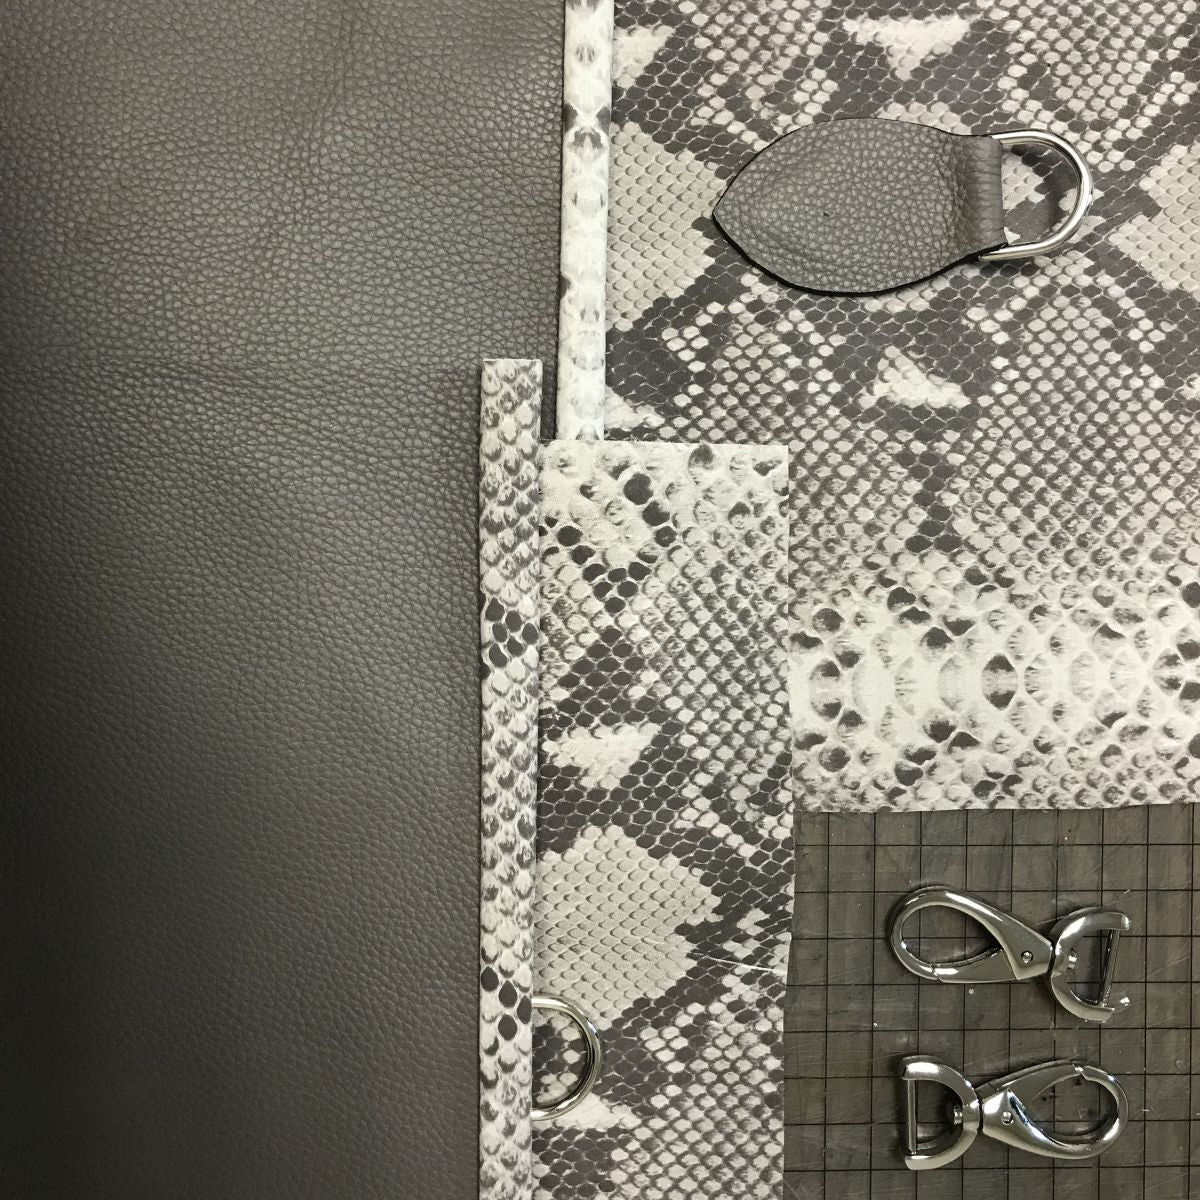
STEP 2 With Tanners Bond Tape, fold the top of the tap around the D-ring. Fix the tab in place on the body of the bag following the markings on the pattern. These tabs are placed 9” from the top edge, and 5.75” from the side edge. Use the Wing Divider to mark a border. Punch sewing holes, then sew on tabs using Carriage Thread.
|
|||
|
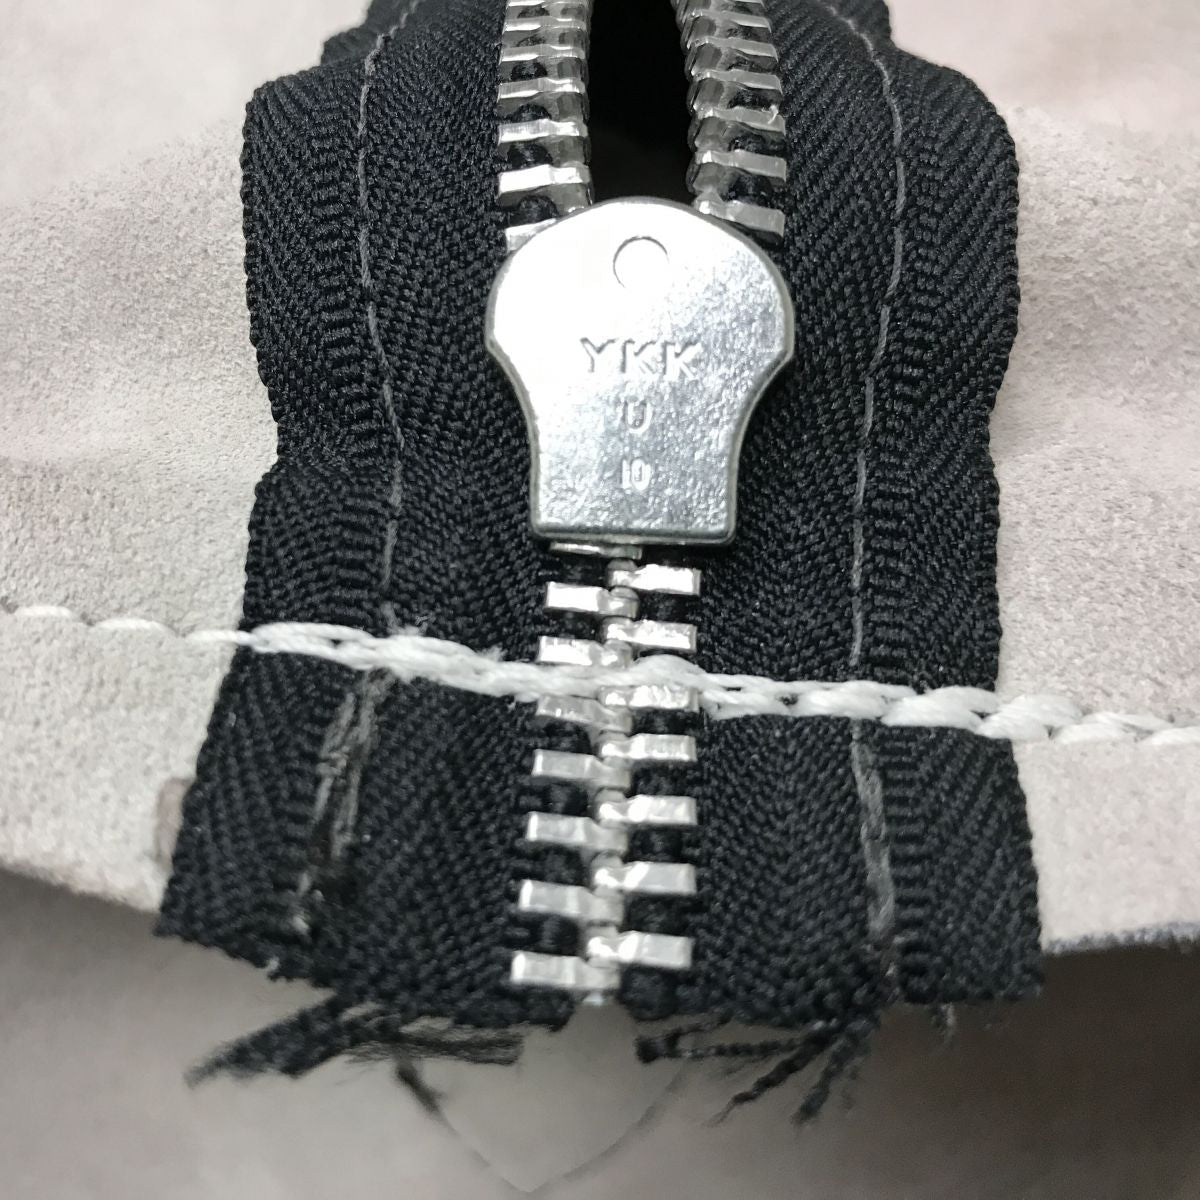
STEP 3 To save time and create a single set of holes in your leather, place the zipper wrong side down (so right sides are together) on the top edge of the bag, taping one side of the zipper to the edge turned right-side out. Secure it in place with tape and topstitch with your Craftool® Pro Stitch Master® or sewing machine.
|
|||
|
STEP 4 Next, sewing the tab in place on the side panel. Using the same technique as the zipper, tape down the top trim to the top edge of the pocket so the faces are together. Then, crease the leather to fold it around the top edge of the pocket. Top stitch with your sewing machine, or by hand. Tape the side pocket onto the side panel with 0.5” of seam allowance, with the bottom edge of the pocket puckered to allow room for items to be placed in the pocket.
|
|||
|
STEP 5 For this project, we skived edges, folded them in half, and taped the piping to secure it together. While piping can be filled with rope or cord, it’s not necessary when using leather. Next, tape piping to the border of the side panel so the rough edge of piping, side panel, and side pocket all meet. To make sewing easier, skive the rough edges of the pocket and side panel 0.5” from the edge.
|
|||
|
STEP 6 Tape the side panel to the body of the bag (right sides together), accounting for a 0.5” seam allowance.
|
|||
|
STEP 7 Leaving zipper tape unzipped, back stitch the zipper tape to secure it in place. Cut off any excess.
|
|||
|
STEP 8 Carefully turn your bag right-side out.
|
|||
|
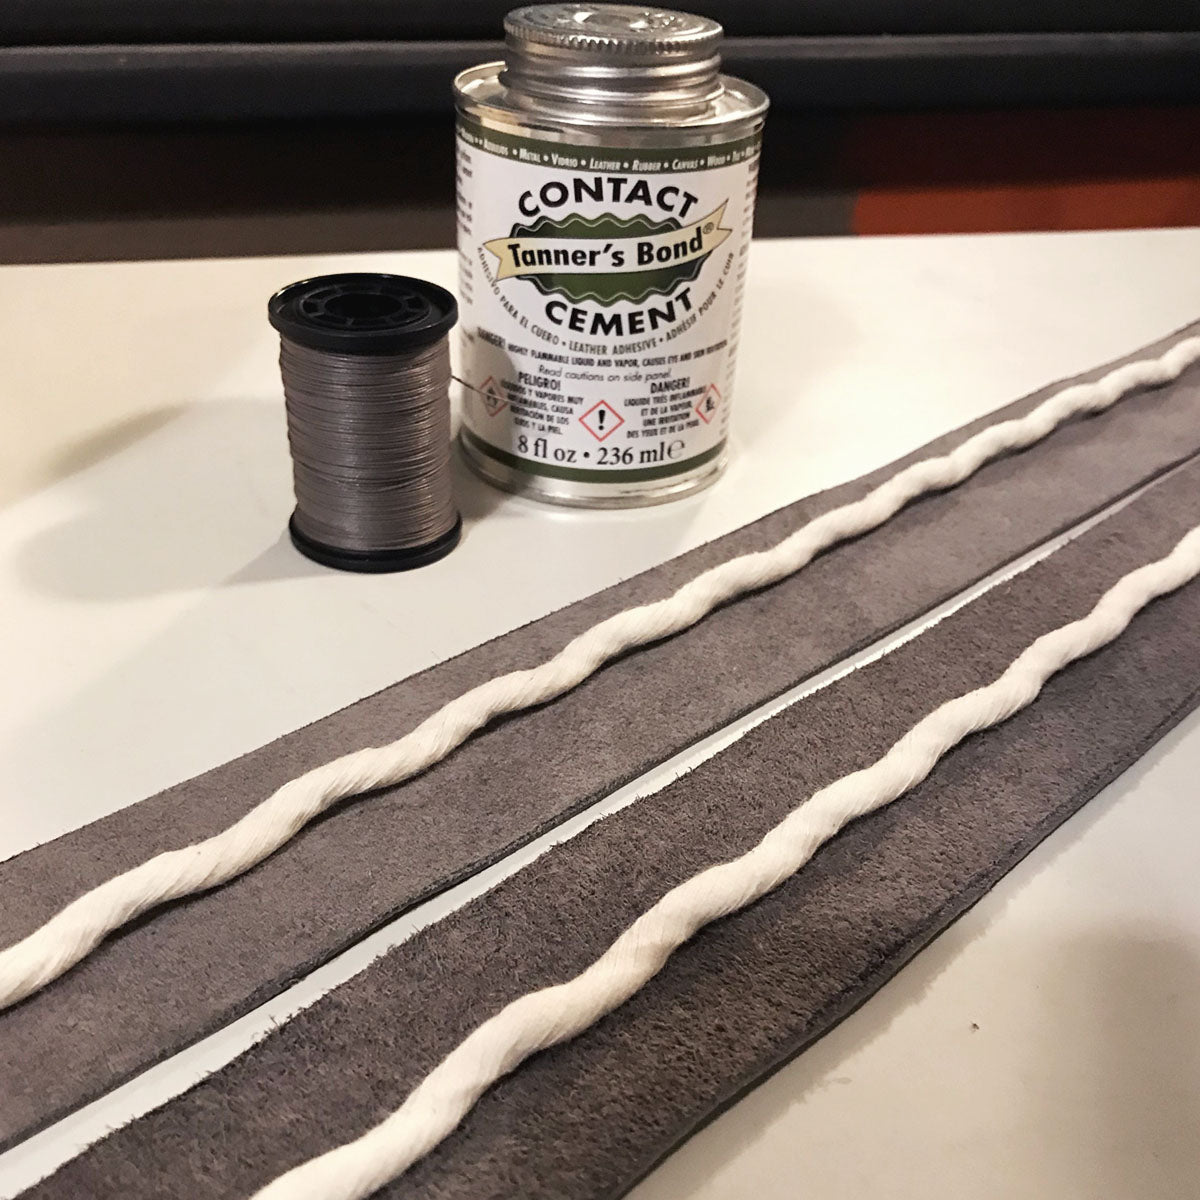
STEP 9 Using Tanners Bond Contact Cement or Tanners Bond Adhesive Tape, glue rope into the center of the handles, fold in half, and sew. Leave tabs unsewn so they can be attached to the D-rings on the bag’s body. Then apply several layers of Edgeflex. For more ways to construct rolled handles, check out these two examples from Al Stohlman’s book, The Art of Making Leather Case, VOL TWO.
|
|||
|
STEP 10 Fold the tabs around the D-ring and sew handles on. Finally, make a strap and attach swivel hooks to each end.
|
|||
|
That’s all there is to creating a stunning Weekender bag! Pack it up and whisk away to your next adventure, with everything stowed away in a handcrafted creation that’s entirely your own.
To share your Weekender bag or other inspirational leatherwork projects, follow and tag @tandyleather on social media! |